
RiverCal How-To Guide
The Calendar How-To provides step by step instructions on using the RiverCal system including adding and changing an event.
Navigating the Calendar
1. Searching
At the top of the calendar page are three search bars:
- Events In (Search by Month)
Clicking on the search box will show you a yearly calendar. Select the month to view the events for that month. - Search (Search by Text)
This is a more traditional search box you can use to hone in on specific events. - Near (Search by Location)
Organize search results by city or specific location.
You can use more than one search bar at a time to find the events that you need.
2. View Modes
Select option under “view as”
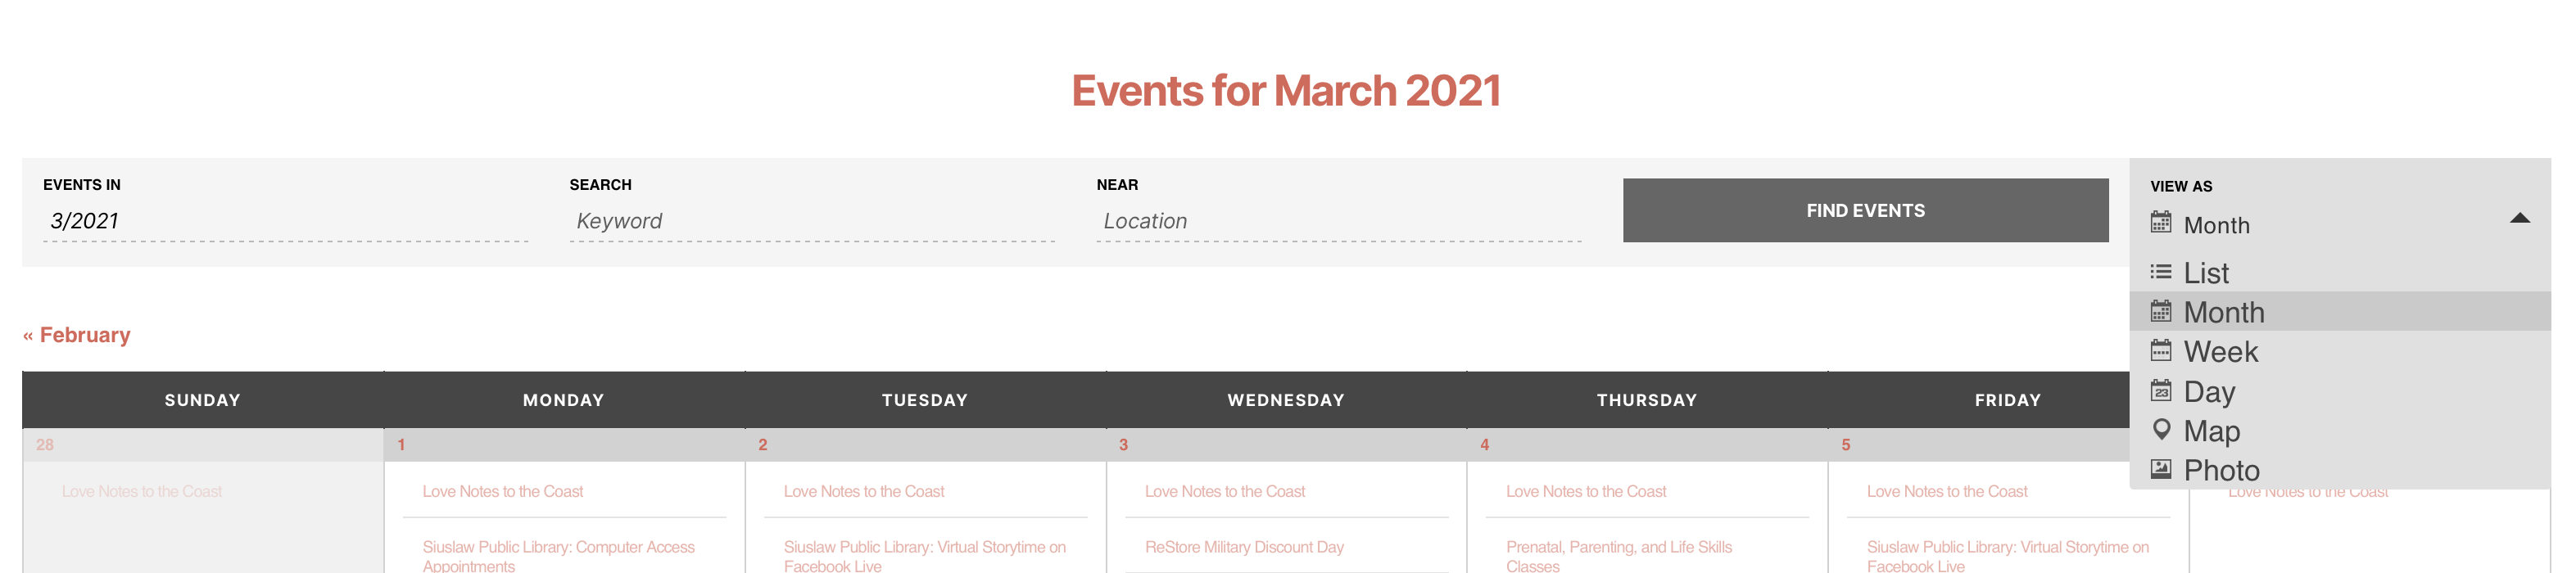
There are six ways for you to view your community calendar. They are:
- Month View
This is the default view of the website. Hover your mouse over events to view a quick summary. If more than five events are on a single day, click “See All X Events” to view that day’s events in Day View. - List View
List View displays a list of the different month’s events. If an event is recurring (happens more than once), it will show the most recent iteration of that event on the list. This is a great tool to see the variety of a month’s events at a glance. - Week View
This view option looks very similar to Google Calendar’s default view. The Week View uses a more visual approach than the others. By viewing which events overlap each other, you can schedule ahead for times that allow the most people to be free to attend. - Day View
Day View follows the same rules as Month View, but displays a list of events for a single day. - Map View
Using Google Maps functionality, Map View functions similarly to List View while generating an interactable map. - Photo View
Photo View organizes events into boxes instead of lists, so you can see more event listings without scrolling down too much.
All views allow you to export their contents to Google Calendar, iCal, Microsoft Outlook, and other third-party calendar tools. For more information, scroll down to the section titled “Exporting the Calendar.”
Try out all of our View Modes so you can view the calendar in a way that you are most comfortable.
Events at a Glance
If you hover over any event, you will see a short preview description of the event.
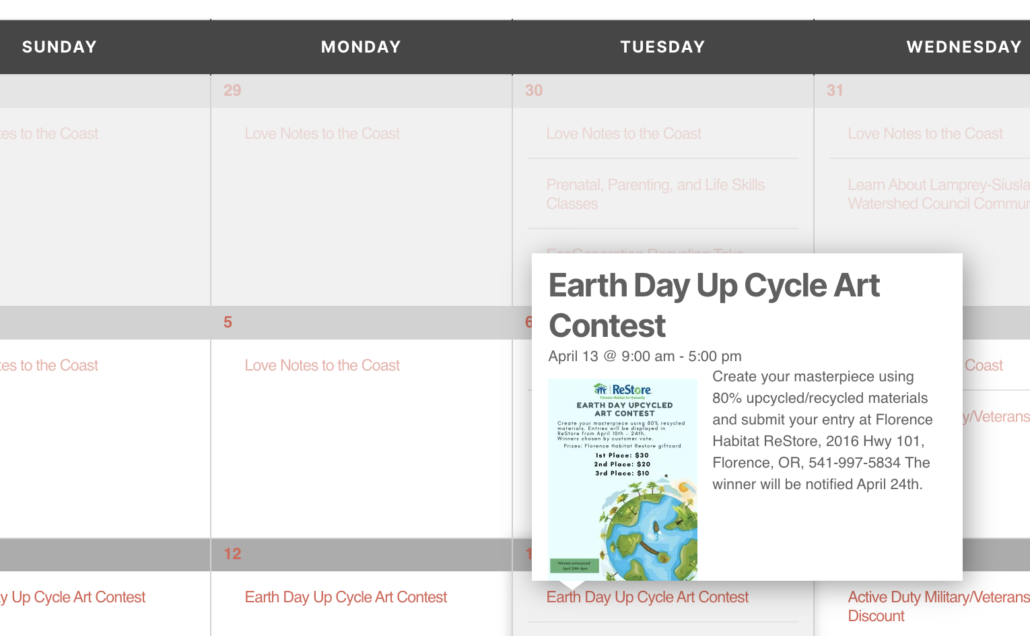
Click on an event on the calendar to view a complete description. Then you will see:
All events posted here have the same basic features:
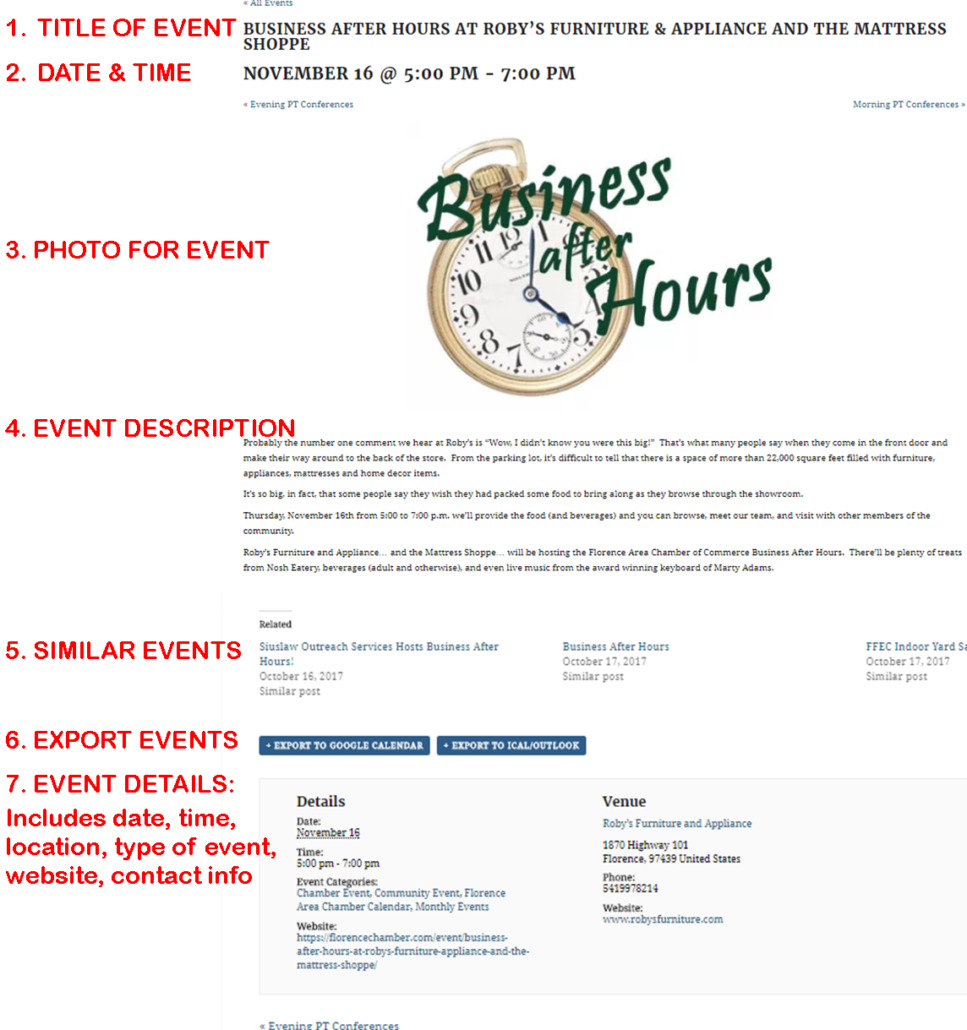
- Name of the Event
- Date, Time, and Recurring Event Information
If the event is a recurring event, the calendar will generate a link to a list of dates and times. By mousing over the Recurring Event information, you can see a summary of when the event happens (ex: “Weekly on the same day”). You can set a custom recurrence message when you add a new listing. - Posted Image
- Event Description
- Export Buttons
Here are buttons that you can use to export the event’s information to Google Calendar or iCal/ Outlook. - Details and Export Buttons
View details like date, time, cost, and event category. By clicking on any of the categories, you will be directed to a calendar specific to that category. - Venue Information
To the right of the details pane is information about the event’s Venue. For more information, scroll down to “Organizers and Venues.” An interactive map is also generated. - Organizers
There can be more than one organizer for a single event. If there is one organizer, it will show a summary of the organization’s contact information. If there are two or more organizers, there will be a list of links that lead to the organizer’s page. For more information, scroll down to “Organizers and Venues.”
Submission Form
Submitting your event is simple! All you have to do is go to Calendar and select Add Your Event on the menu. Once you log in or register an account, you will be directed to a form.
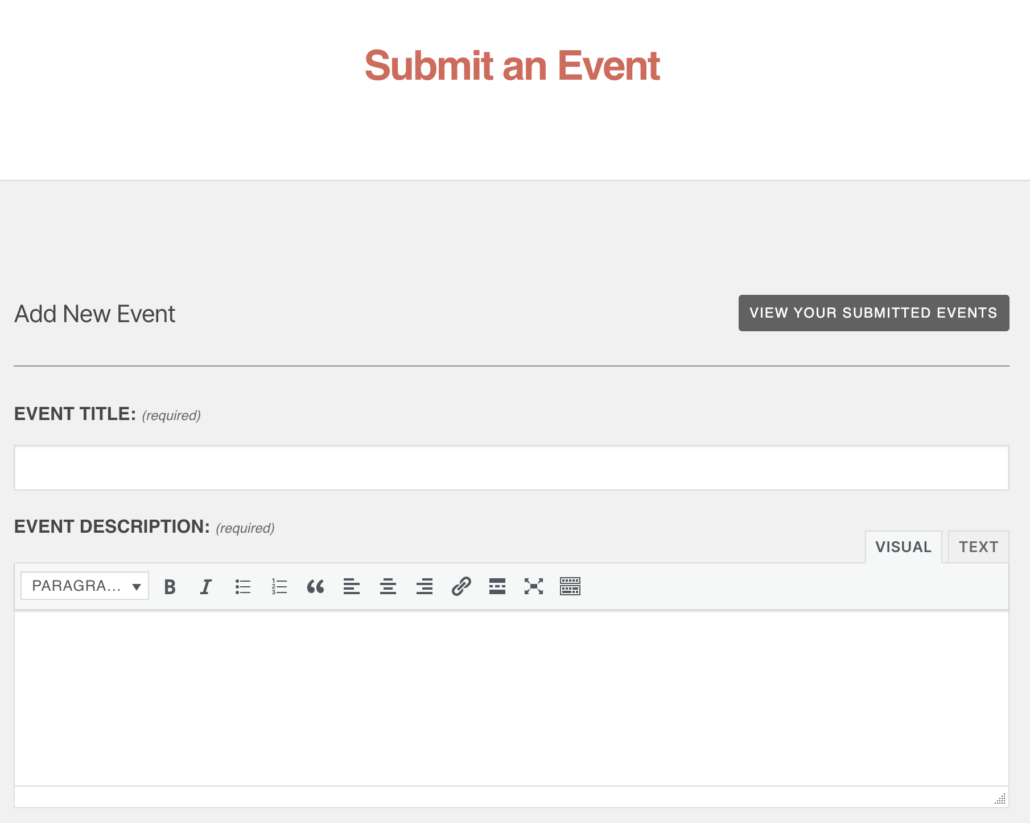
This is what people will see first on the calendar’s month view, so be sure it’s short and to the point.
Event Description
You can add a colorful description for your event, with access to styling tools like bolding and alignment.
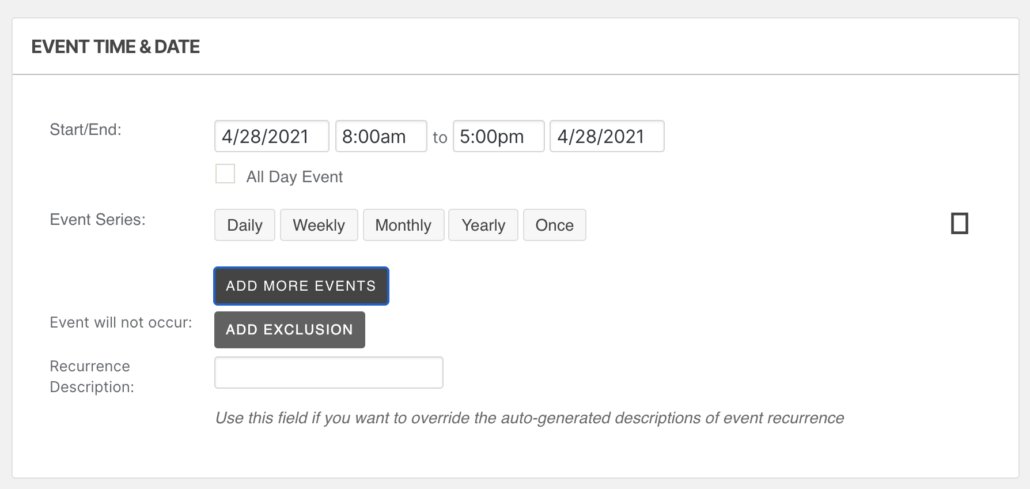
Select when your event starts and when it will end.
Recurrence Rules (Click Schedule Multiple Events)
Schedule multiple events, with different recurrence options. For more information, scroll down to the next section.
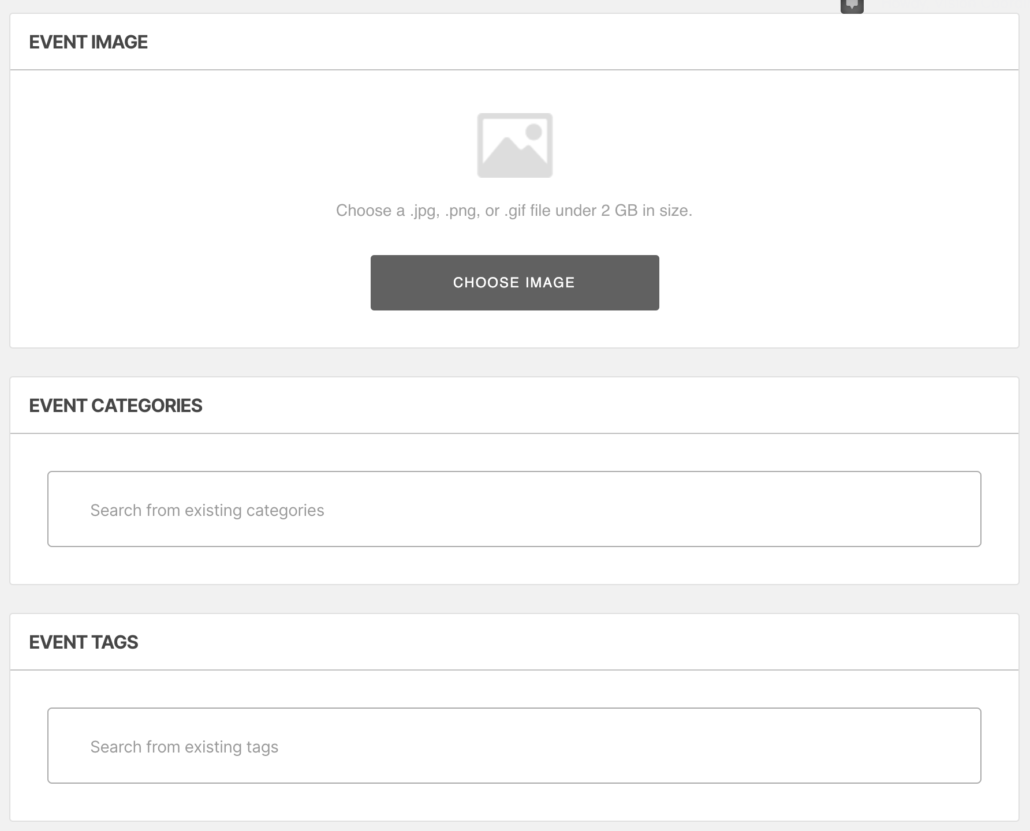
An image can be uploaded for your event. Please try to keep your image sizes small as to not overload the servers on busy days. Click Choose File to select the file you would like to upload. When you have selected your file, click Open at the bottom of the window.
Event Categories
You can select one or more categories for your event. Pick your categories carefully – it will determine how your event is listed under the Related Events section of the event listing page. Categories are set up by the site’s administrative team. If you have an idea for a category that is not listed, please contact us.
Event Tags
Select tags that represent your event.
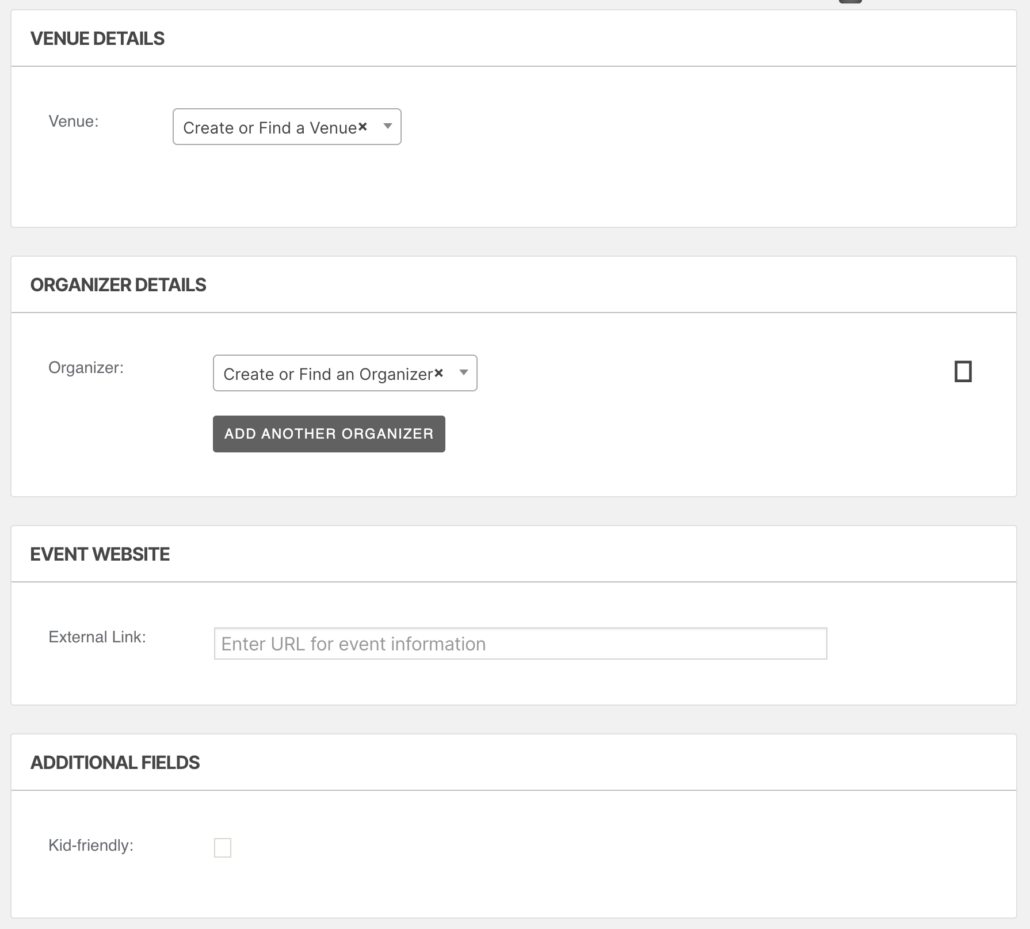
If your organization doesn’t appear in the Saved Venues list, enter the information about your venue so it can appear there for others to use. Remember to provide the phone number and website for the venue owner, not your own personal information! You can enter that information under the next section.
Organizer Details
Enter your organization’s contact information if it isn’t stored in the list of saved organizations. For more information, scroll down to the section titled “Organizers and Venues.”
Event Website
Additional Fields
If your event is Kid-friendly, check the box.
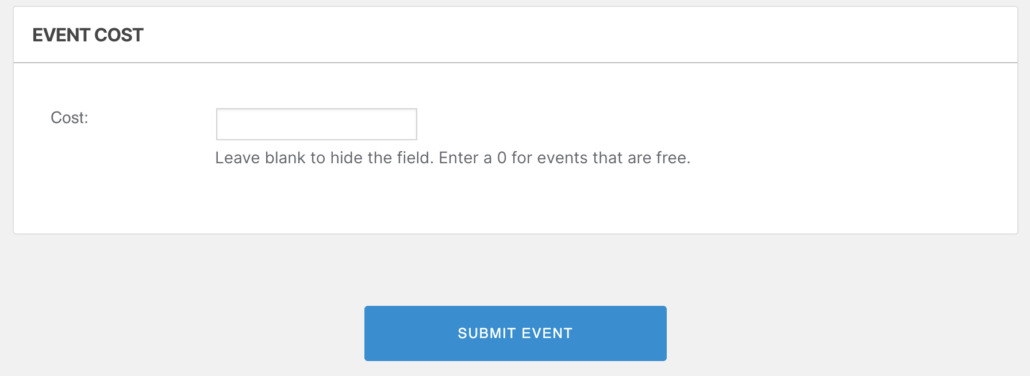
No need to worry about adding the dollar sign! That’s put in place under “Currency Symbol”. If you set the cost, it will appear in its own section on the event’s listing page and on list-type view modes.
When you’re done, click “Submit Event” and voila!
Recurrence Rules and Exclusions
There are 6 types of Recurrence Rules for your event listings. Remember – you can add multiple recurrence rules to an event!
Date
Set a specific date that the event will appear on. For example: If you want to create an event that happens once on a Monday, a Wednesday, and a Friday, you can set the event to Monday and set two Date Recurrence Rules for Wednesday and Friday. That way, you don’t have to input the event three times!
Every Day
Set this event to happen every day until it ends on a certain date, after a set amount of events, or never. Don’t set it to never.
Every Week
Set this event to happen using the same on, after, and never rules. Think about your audience when creating weekly events! It’s a good idea to make an event listing for a class that’s open to the public. It isn’t a good idea to create an event listing for a private council meeting.
Every Month
Use this Recurrence Rule for monthly, public events like fundraisers or inter-organizational meetings. It also uses the on, after, or never rules.
Every Year
This is great if your organization has a big, yearly fundraising event that’s open to the public. A good example of this is the Siuslaw Watershed Council Salmon Celebration.
Custom
This setting is a little more advanced. First, you select when the event will end, using the on, after, or never rules from earlier. Then, you select the Frequency – if it’s daily, if it happens weekly on specific days at specific different times, if it is monthly, or if it is yearly.
Exclusions
If a recurring event does not happen on a specific planned day (due to holidays, vacations, or illness), you can add Exclusions to your Recurrence Rules. Exclusions follow similar rules the above rules. You can set specific exclusion dates, exclusion weeks, months, years, or advanced custom settings.
Recurrence Description
Finally, you can add a Recurrence Description to enter a custom description about how often you meet. You don’t have to do this, but it’s recommended if you’re using a lot of Recurrence Rules and Exclusions.
Be sure to come back and check your recurrent event every month or so. If your event has an indefinite ending, specify an end date for a year out, then add a reminder to your calendar or phone to visit RiverCal to extend your event. That way we can be sure the calendar reflects the most current information.
Organizers and Venues
When creating event, you have to include information about the organization/s hosting the event and information about the event’s venue. This information is saved so that the next time you – or others – create an event listing at the same venue, the process of creating the event goes by much faster. These are called Saved Venues. Here’s an example:
The Florence Regional Arts Alliance submits an event for an art class at the Florence Events Center. Two weeks later, they are hosting a different event – this time, an arts exhibition. The arts exhibition is also taking place at the Florence Events Center.
Instead of entering the venue’s information, the person creating the event finds “Florence Events Center” in a list of Saved Venues. By not having to enter the same information twice, creating the event goes much faster!
Months later another organization, the Center for Nonprofit Stewardship, decides to submit a listing for their workshop at the Florence Events Center. While creating the listing, the nonprofit volunteer finds the Florence Events Center in the list of saved venues. Creating the event goes much faster.
Venue information isn’t the only type of data saved when creating an event. When you enter an organization’s information, that info is included in a list of Saved Organizers. Here’s an example of their usage:
The Florence Regional Arts Alliance (FRAA) and the Center for Nonprofit Stewardship from earlier decide to team up to create a community event. A representative from FRAA is designated to post the event onto this website, but doesn’t know the Center for Nonprofit Stewardship’s contact information. In this case, the representative doesn’t have to – both organizations are listed under Saved Organizations and the event is created in no time!
When you use Saved Venues and Organizations, you are contributing to that venue/organization’s page on our site. By clicking on the name of the venue/organization on any events page, you can view all of the events that are related to that venue/organization.
You are also participating in a community of networkers and collaborators. Not only is it easier to post events with multiple organizers – you’re also working together to flesh out a database of organizers and venues in your community and making the act of sharing an event easier for everyone.
Exporting
By clicking the Export links around the website, you can download an .ics file that can be imported into Google Calendar, iCal, Microsoft Outlook, and other third-party calendar software.
Here are links to guides on how to import the downloaded file into popular software and website calendar choices:
1. Importing Events to Google Calendar
Click here for instructions on how to export your event into Google Calendar.
https://support.google.com/calendar/answer/37118?hl=en )
2. Importing Events to iCal
Click here for instructions on how to export your event into iCal.
https://smallbusiness.chron.com/import-ics-ical-52066.html )
3. Importing Events to Microsoft Outlook
Click here for instructions on how to export your event into Microsoft Outlook.
https://support.office.com/en-us/article/Import-iCal-or-Address-Book-items-into-Outlook-2a637ac6-f3b5-411d-8a73-016bd90c1094 )